
How to Organise 100,000 Photos on Windows in 2026
A practical guide to getting on top of a large photo collection on Windows 11, without cloud storage, manual filing, or software that can't keep up with large photo folders.
5/28/20264 min read
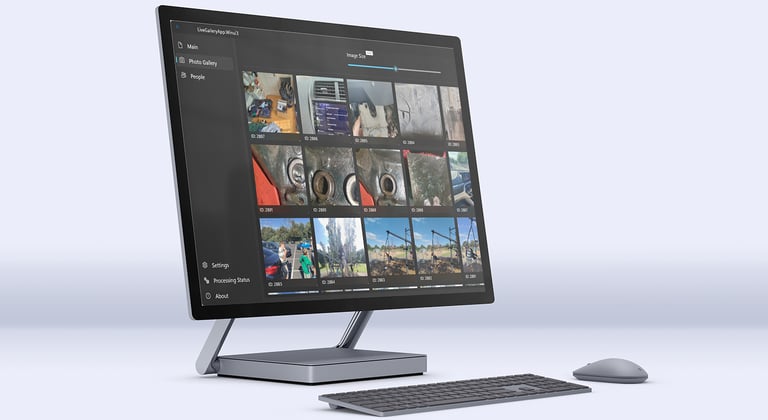
If you have tens of thousands of photos spread across hard drives, old laptops, SD cards, and folders with names like "Camera Roll 2," you're not alone.
This is one of the most common problems Windows users face and one of the least well-solved. The tools that exist are either built for professional photographers, require uploading everything to the cloud, or simply can't handle the scale without grinding to a halt.
Here's a practical guide to actually getting on top of a large photo collection in 2026.
Step 1: Stop moving files manually
The instinct when facing a chaotic photo library is to start creating folders and dragging things around. Resist it. Manual organisation at scale is a trap. You'll spend hours moving files, create a new mess in the process, and still have no way to search or browse what you've got.
The right approach is to find a tool that indexes what you already have without touching your folder structure. Your files stay where they are. The software builds a catalogue on top of them. That's how Picasa worked, and it's the right model.
Step 2: Consolidate everything onto one drive first
Before you open any software, get everything in one place physically. Pull photos off old laptops, SD cards, USB drives, and phone backups. Copy them all onto a single external drive or your main internal drive.
Don't worry about duplicates yet. Don't worry about folder names. Just get everything in one location so your software can find it in one pass.
If you're working with a NAS, most good photo managers can point directly at a network drive. You don't necessarily need to move everything to a local drive first.
Step 3: Let the software do the heavy lifting
Once everything is in one place, a good photo manager should be able to:
Index your entire library on first launch, regardless of size. If it slows to a crawl at 10,000 photos, it's not built for your use case. Libraries of 100,000 to 500,000 photos are not unusual. Your software should handle them without complaint.
Organise by date automatically. Most photos have EXIF data embedded by the camera or phone that includes the exact date and time they were taken. A good photo manager reads this and lets you browse by date without you doing anything.
Search instantly. You should be able to type a date, a tag, or a person's name and get results in under a second. If the search takes more than a moment on a large library, the indexing isn't being done properly.
Recognise faces locally. If you have years of family photos, face recognition is the single most powerful organisational tool available. The key is locally, your photos and the faces in them should never leave your machine to be processed on a server.
Step 4: Tag as you go, not all at once
The biggest mistake people make when organising a large library is trying to tag and caption everything in one sitting. That's a project that will never get finished.
A better approach: browse your library using the date and face recognition tools first. When you find a set of photos you care about (a holiday, a birthday, a specific year), spend ten minutes tagging that set and move on. Over a few weeks, the important stuff gets organised. The rest can sit in the background, indexed and searchable, without every photo needing a manual label.
Step 5: Decide on your duplicate strategy
Large libraries almost always contain duplicates. The same photo backed up multiple times from multiple devices, slightly different crops of the same shot, and burst mode photos that look identical.
Duplicate detection is one of the most useful features a photo manager can have. A good implementation compares images visually rather than just by filename, so it catches true duplicates even if they've been renamed or moved. Once identified, you review them and decide what to delete. Don't let software auto-delete without your say. The cost of a mistake is losing a photo you can't get back.
Step 6: Stop the pile from growing back
Once your library is under control, keeping it that way is easier than the initial sort. A few habits help:
Import from your phone regularly rather than letting years of photos pile up. A monthly habit of ten minutes is far less painful than an annual session of ten hours.
Keep your folder structure simple. Year and month is enough. Event folders inside that if you want. The software handles search and browsing, so you don't need an elaborate manual filing system on top of it.
Back up to at least two places. One local, one offsite. A single external drive is not a backup. If it fails, everything goes with it.


The tool that makes this possible
Most of the steps above depend on having a photo manager that was actually built for large libraries. Fast indexing, local face recognition, instant search, duplicate detection, and NAS support are not features you'll find in every tool.
Live Gallery was built specifically for this use case. It handles large libraries of photos, and everything runs locally on your Windows machine. No cloud account, no subscription to get started, no files leaving your drive.
Free beta opens June 16th.
Organise your photos with
ease and privacy.
© 2026 Live Gallery App. All rights reserved.


Menu
Useful Links